Showing posts with label knitting. Show all posts

Sunday, February 19, 2012

A gifted shawl

I have a friend at work who graciously gave me a loom. Yes, a complete weaving loom!

As a (very small) token of my appreciation i knitted a shawlette for her.  I used the lace weight mixed wool singles spun a couple months ago. If you're interested in how the wool was spun, check out this post.

Mixed wool hand spun singles

Mixed wool hand spun singles
The pattern is Mono's Darling, darling, stay with me shawlette (the pattern is free, just log in).  A beautiful quick knit, perfect for a gift.  I added small glass beads to the last two lace rows of the pattern because... well, because I just have to change everything!

Lace shawl

Lace shawlette
For help on how to knit with beads check out this article in Knitter's review.  I used a very small crochet hook to pull the yarn through the eye of the bead.  It was a bother because the beads are tiny, but I am happy with the results.

And I do believe my friend is genuinly happy with her gift.

Sunday, January 1, 2012

Stitchmarkers

Spent an hour the other night making stitchmarkers with beads and cord.


They are very simple to make:

Carefully melt the end of the cord with a lighter, quickly form the end of the cord to a tapered end with wet fingers.
Place all the beads for one stitch marker on the cord:  ----oOooOo--------------

Make a knot on one end:  ----oOooOo----------&  
melt the end of the cord after the knot to a small ball of nylon.

Cut  the cord to the lenght you want, remember that the middle knot and the end knot will "eat" some of the cord length.

Make a knot on the other end:   &-------oOooOo----------&
melt the end like you did with the first knot.

Now divide the beads to two sides:   &oOo--------------------oOo&

Fold the cord in half and make a knot for the loop:


Thursday, December 15, 2011

UFO recussitation

My daughter reminded me of a sweater I had promised her last year... It's always embarassing to admit that a promised gift has turned into a UFO!

(= UnFinished Object)

So I got it out again and have recussitated it , it seems to be alive and breathing at least for the moment.

Tone on tone sweater in shadow knitting
The pattern comes from "Shadow Knitting" by Vivian Hoxbro and uses a really neat technique.  Working with knitted and purled stitches you make a pattern that only shows when looking at it from the side.  So, vertical stripes turn into horizontal stripes depending on your advantage point.

Please excuse the poor picture quality, but I wanted you to see how it works!


Sunday, December 11, 2011

More brainless socks

I'm sorry it's been so long.  Time is just not on my side right now!  With work, school and family there is just not time to sew, spin or knit...

But, I have finished a pair of socks

Brainless socks
The pattern is from Ravelry and is called Brainless.  The yarn is handspun rya wool.  Handcarded and spun woolen.


Thursday, October 27, 2011

A cowl for coming winter

I found this wonderful merino yarn and just could not resist it!  Check it out:  link  I ended up making a cowl!


The pattern is very simple, I found it on Intrepid Fiber Wizard's website.  I did change it a little and used a full 100 gr skein of yarn which made the cowl long enough to become headgear as well.  The springiness of the yarn makes a very elastic fabric, which is great for this project.

Wonderful yarn.
Great pattern.
Simple knitting.
Quick project.

Can it get better?

Friday, October 14, 2011

Ullared progress

The Ullared sweater is slowly coming along, I'm slowly making my way to the armpit where I will be adding a arm gusset.  More on this later.

You want to see?

Sunday, September 11, 2011

Steeks... (or the Ullared sweater part 3)

I'm knitting and knitting om my Ullared sweater, realizing that I am getting closer to the point of no return, when I reach the beginning of the armhole and have to decide to start knitting back and forth or continue in the round and make a steek.

Steeking is a technique used to be able to knit a entire sweater in the round, and when done cut (yes, cut!  EEEK!  Ahaa!  that's why it's called a steek - the knitter screams EEK!  when thinking about it..) the knitting to fit sleeves in and shape the neck.

Knitting a steek is a new challenge for me, I haven't quite gotten there yet but I'm researching it, and here is a great instruction for steeking.


Wednesday, August 24, 2011

A new start (or the Ullared sweater part 2)

I've finally started my Ullared sweater (see part one here).  In making the rib edging I realized the dark gray and the light gray looks really nice together, so I changed the color scheme.  The first border is dark gray and white, the rest of the sweater will be light and dark gray.

It's a monumental project, but this is a start! 


Tuesday, June 14, 2011

The scrappy helix scarf

Since I have nothing else to do with my time (like packing for the move, working on the Storm-at-sea quilt, knitting the Ullared sweater, or... gasp... cleaning the house) I've started a helix scarf with the leftover yarn from the Shifty triangle mittens.


This is what I did:
Yarn: Drops Delight,
         Color nr 10
         50gr = 175 meters (1,76 oz = 191 yards)

I used two double pointed needles 3mm because they don't take much space when knitting.

Cast on 20-40 stitches (depending on how wide you want your scarf), I did 30.
Knit all the stitches on the needle, turn.
*Knit 8-15 stitches (how wide do you want the center of your scarf?), I did 10.  With the yarn behind the work, slip a stitch purl wise.  Turn. Knit to the end of the needle.
Knit 4-8 stitches (I did 5).  With the yarn behind the work, slip a stitch purl wise.  Knit to the end of the needle.
Now knit all the stitches on the needle, to the othe side.*
Repeat from * to * until desired length.  (and then add some or you will think it's too short..)


Good Luck and enjoy your knitting!

Thursday, June 2, 2011

Do you get all silly over mittens too?

Have you seen this web page?  It appears simple at first sight, but I can drool over it for ages!  So many wonderful mittens...

Cimdu Raktsi

Monday, May 30, 2011

The reindeer socks are finally finished!

I suppose they became a UFO (unfinished object) lying there in my knitting basket waiting for me.  But now I finally got my act together and finished them.


The pattern is a Drops pattern and can be found here.  They were tried and found true on a all day kajak trip yesterday. 

Friday, May 13, 2011

Just shoot me.... (or the Ullared sweater part 1)

I think I have just started the biggest project of my life.

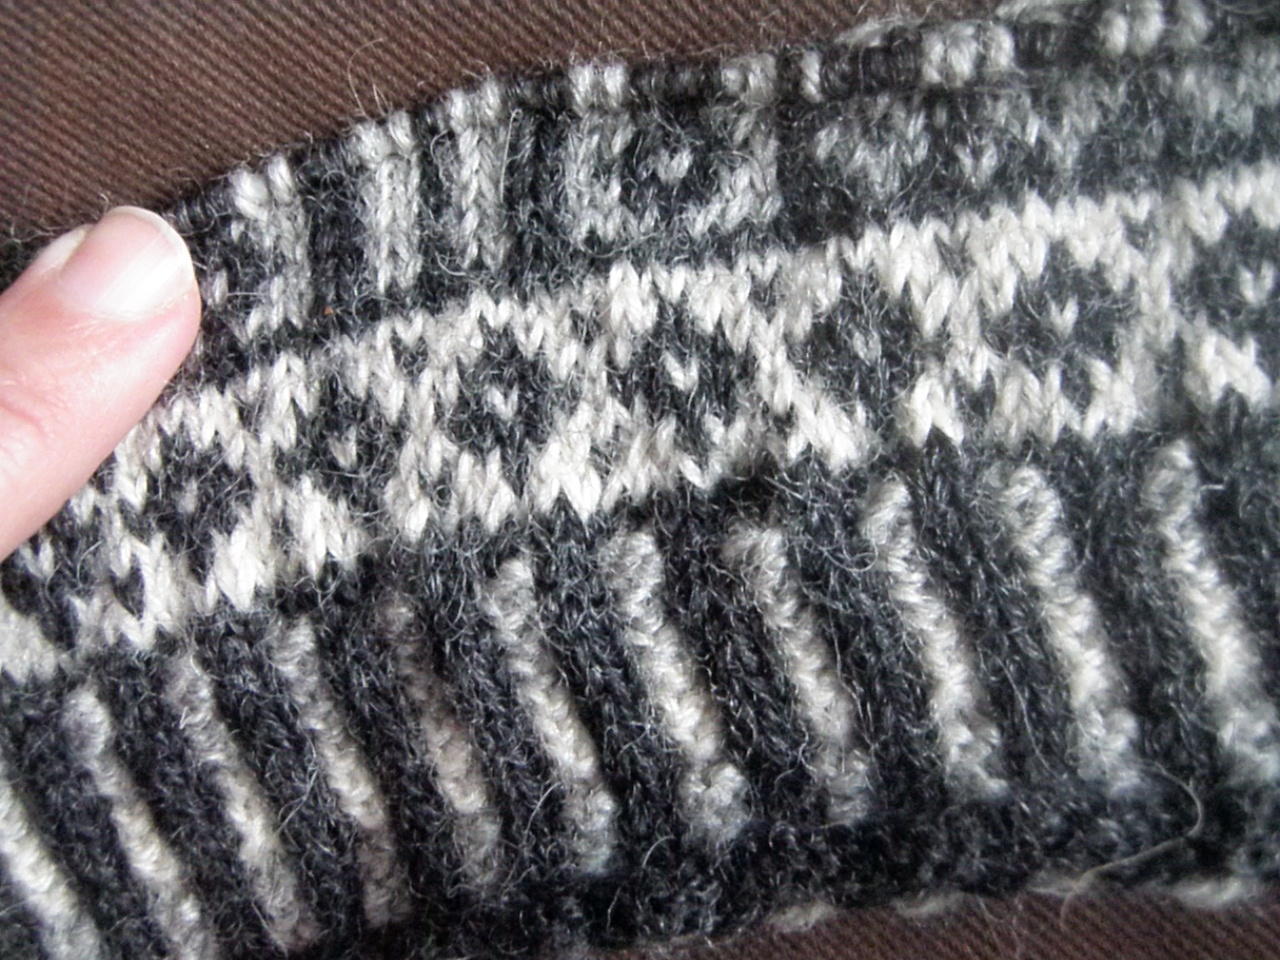
I've always been interested in history, and especially historic knitting and quilting.  I can wonder about a antique quilt or sweater, who made it, who used it, how did their lives turn out.  There are plenty of antique dress clothes, but unfortunately working sweaters have, literally, been worn to threads.  This is a lumberman's sweater from late 1800's. 


It's tightly knitted in a two color stranded knitting, almost water proof and wind proof because of the small guage. 

I got the yarn in the mail yesterday, a Scottish combed wool 3-ply.  Surprisingly soft.  In natural wool colors unlike the original.


I don't have a pattern, but let's not let that stop us, eh?  I think I can figure it out along the way, with some guidance from a couple books on antique fisherman's sweaters.

I started with a swatch, to get a guage, get a feel for the stranded pattern and figure out what size needles I am going to work with.  The original is probably knitted with 1 to 1 1/2 mm needles, but there ARE limits!

The swatch is made with 2 mm needles, which made a thick, tight, supple fabric.  Knitting an entire sweater with 2 mm needles feels.... scary!  So, I'm going to make a swatch with 3 mm needles too. 

The 2 mm needles gave me a guage of 44 stitches and 42 rows in 4 inches (10 cm).  Let's not do the math to find out how many stitches are in a whole sweater, at least not yet..

Monday, May 9, 2011

Shadow knitting

Have you tried shadow knitting?

It's a simple way of knitting that gives you a interesting effect.  Looking at the fabric fram above, you have horizontal stripes.


When you change your perspective, the stripes turn vertical.

Isn't that cool?

It's the knits and purls that do it:

Sunday, May 1, 2011

Fair Isle fingerless mittens - a guide

I've been reading Sheila McGregor's Traditional Fair Isle Knitting.  A wonderful book for people like me, interested in history and knitting.

Inspired, I came up with this:


This is not a pattern, but a guide to making your own pattern.

To figure out how many stitches to cast on:
Make a swatch and figuer out how many stitches you knit per inch. Measure you wrist, add 1/2 inch for movement.  Multiply the measurement, in inches, with the amount of stitches per inch you get from your swatch.

Example:  My wrist is 7  inches + 1/2 inch for movement = 7 ½ inches.  My swatch gives me a guage of 8 stitches per inch.  7,5 times 8 = 60

I casted on 60 stitches and used 2 mm double pointed needles and 2-ply scrap wool yarn.

The ribbing is a knit2 purl2 rib, using the background color for the knits and a mix of the other colors as the purls.  I ribbed 8 rows.

The first pattern is a simple zigzag, this pattern repeats 3 times on the mittens, I put it first, last and in between the larger patterns.


The bigger patterns are from the book, but there are so many nice free Fair Isle patterns to copy.  Search pattern databases such as Ravelry (this requires a log in id, but it's free)  and Drops (write "fair isle" in the search box).  I added a couple stitches to accomodate the patterns.


The pattern in blue is a OXO pattern.  I used the X to give me a starting place for the thumb increases.  I added first one stitch in the middle of the X and then one stitch on each side of the first increase every other row for a total of 14 extra stitches.  The other pattern continues on both sides of the thumb increase. 


I kept trying the mitten on my own hand, figuring out how many stitches were needed and how long to knit before putting the thumb stitches on a thread.


On the next row, I just skipped the thumb stitches and joined the remaining stitches together, continuing the knitting until I got the length I wanted.

The top edge is made like this:
Row 1 (that is row 1 of the edge, it's probably your row 145 or something ): ( k2tog, yo ) repeat until end of the row.
Row 2: knit all stitches.
Row 3-7 knit all stitches.
Cast off loosely.
Turn the edge at the k2tog, yo row and sew the hem to the back

Thumb:
Pick upp the stitches on the thread and pick up as many stitches as you need from the back of the thumb.  I picked up 6 stitches.  Knit as far as you want.  Cast off.

Good Luck!

Thursday, April 28, 2011

Shifty triangle mittens pattern


Stranded knitting.
Knitting in the round.
Decreasing.
Picking up stitches.

If this is your first try at a mitten, you might want to look at another, more descriptive pattern too.  This is a simple pattern for experienced mitten knitters.

Do you want a pdf copy of this pattern?  Click this!


Yarn: Drops Delight,
         Color nr 10
         50gr = 175 meters (1,76 oz = 191 yards)
         I used about 75 gr of yarn for my mittens.
Tension: 26 stitches x 34 rows = 10 x 10 cm (4" x 4")


Needles: 2,5 mm double pointed needles/US 1 or 2


Pattern:

The yarns is varigated and knitted stranded, using either two balls of yarn or one strand from the outside of the ball and one strand from the inside of the ball.  This causes the shifting of colors throughout the  pattern.   The two strands of yarn may become very like in color during your work.  If this happens cut one strand (and secure in the stitches weaving in the end) and discard enough yarn to clearly see the shift in color between the strands. Secure the end in the stitches and start again. 

Cast on 66 stitches.
Divide stitches on needles, 16+17+16+17.
Knit one closing the round, making sure the stitches are not twisted.  Continues knitting 2 rows in one strand of yarn.

K1 in the lighter shade, p1 in the darker shade.  Repeat for 2 rows. (or more according to tase)

Knit one row in the darker shade.

Start diagram nr 1:

Shifty triangle mittens diagram nr. 1


The two sides of the mitten are not equal, just continue the pattern on the round. (Do not start over the pattern on the second side!)  The blue line is a scrap thread of different color that will make the thumb: knit the scrap yarn over 14 stitches, put the stitches back on your right hand needle and knit them again acording to the diagram. (This is only done on the back side of the mitten, on the front side:  keep knitting the diagram)  Make a thumb-thread for one right hand mitten and one left hand mitten.

Make note of this, I have made several pairs of mittens that have the thumb on the same side, it's very easy to miss...  But of course, you are smarter than me!


Continue knitting the diagram.
When you get to the decreases, I found it easier to make the decrease with both strands of yarn.  If you do this make sure you are really decreasing as you should, since you've got two strands of yarn in the last stitch.

For the right hand decreases I used a k2tog tbl.
For the left hand decreases I used a k2tog.

When the diagram is finished, cut your yarn, pull the ends through the remaining stitches and secure them well, weaving them in the stitches on the back.


Thumb:

Pick up the stitches on both sides of your thumb thread, adding two stitches on each side making 16 stitches on each side of the thumb.

Knit according to diagram 2:


Knit  in the same way as the mitten, the back side is the same as the front. The pattern is a 2x2 stitch square as seen in the drawing.   When weaving in the ends make sure to sew closed any holes between the thumb and the mitten.


Wash and block.


Good Luck!


Monday, April 25, 2011

A cute little purse that I will never make..

Isn't this the cutest little thing?  Unfortunately I will never make one,  it's probably one of those things that are sooo very dute, nice, unresistable, wonderful and all theese other things.  And something that I really don't want to own, just admire from afar. 

But just maybe you want to make it, and I can admire yours!


365 saker du kan sticka: #358 Dots and stripe purse: "

Friday, April 22, 2011

Friday, April 15, 2011

Shifty mitten on the needles

I'm slowly progressing on the shifty triangle mittens.  The first one is finished and I'm working on the second at the same time as the pattern is written.  I'm not very accomplished at pattern making so it's... well, confusing!  Hopefully the final result will not be confusing.

Monday, March 21, 2011

Playing with patterns

I've spent the last couple of days playing with two strands of varigated yarn.  I love the way both sides of the pattern shifts in color. 


It is probably a pair of mittens... pattern is on the way.

Thursday, March 17, 2011

More socks...

I've started a new project... again!

A while back I bought a couple balls of yarn for myself while buying birthday yarn for my sweet mother.   Isn't this lovely?


It's been lying around teasing me, but now I found this wonderful pattern on Ravelry's pattern database called Kalajoki.  It's named after a river in Finland and it looks like a river flowing down the sock.


I was a little worried that the different colors would break up the pattern, but I think it will work.